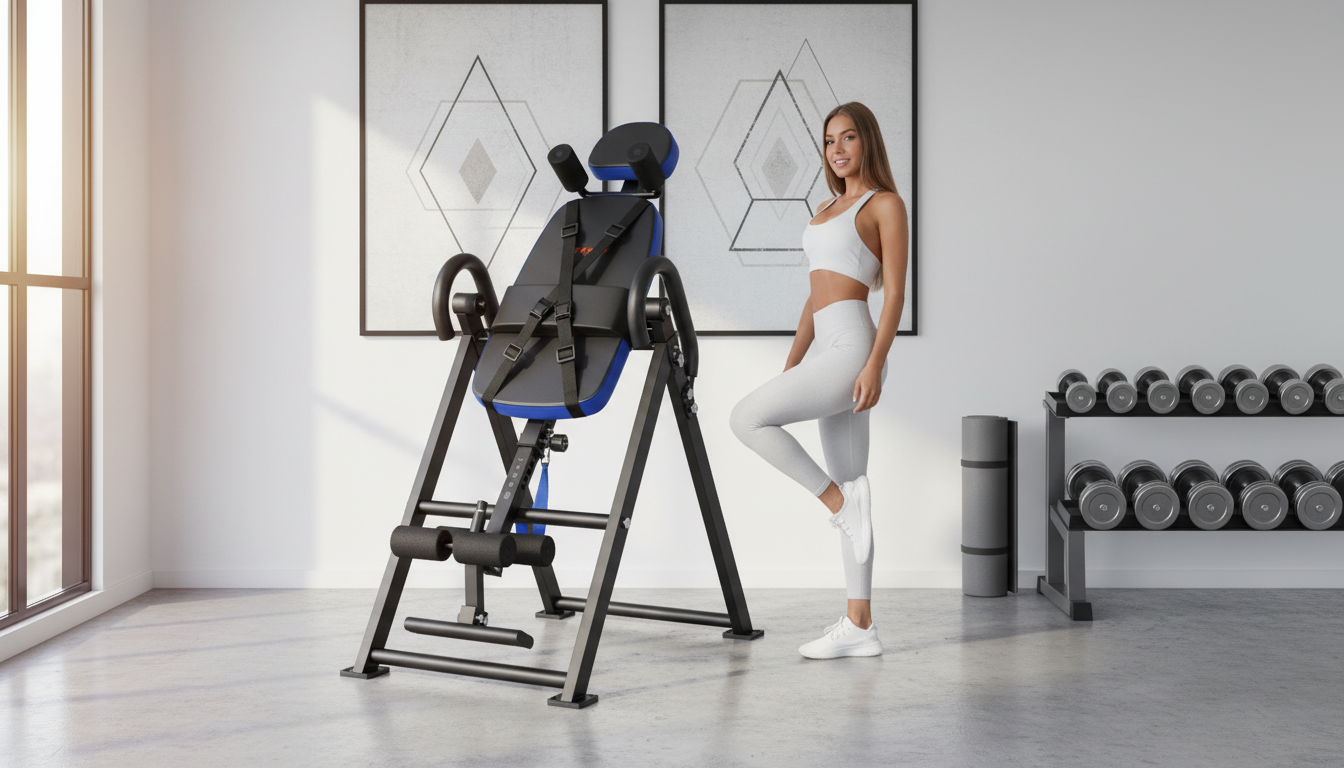
A heavy duty inversion table is built for stable, controlled inversion so you can use gravity to create a traction-like stretch through the back at home. People reach for inversion when they want a simple routine that may temporarily reduce pressure in the spine, ease muscle tension, and help them feel looser after long days of sitting or demanding workouts. The biggest differentiators are a sturdy frame that stays planted, secure ankle supports that don’t pinch, smooth angle control, and setup details that make it easy to use consistently and safely.
Inversion tables position you at an angle (or fully upside down) so body weight and gravity create gentle decompression through the spine. Many users describe this as a “long, tall” feeling through the lower back and hips, especially after prolonged sitting, heavy lifting, or high-impact training.
For a balanced overview of benefits and precautions, see the Cleveland Clinic’s guidance on inversion therapy. For broader self-care context for back discomfort, Mayo Clinic’s back pain overview is also a helpful reference.
Not every inversion table feels the same under load. A heavy duty build is primarily about confidence: a stable base during transitions, durable pivots over time, and a “solid” feel when you lock in and return upright.
Inversion isn’t appropriate for everyone. Because body position can increase pressure in the eyes and influence blood pressure, medical clearance matters if you have certain conditions.
If lower back pain is persistent, recurrent, or accompanied by neurological symptoms, the AAOS overview of low back pain can help you understand when to seek evaluation.
Daily use depends less on “maximum inversion” and more on how the table behaves during the moments that tend to feel sketchy: mounting, rotating back, and stepping off. Look for the features that reduce hesitation and make your routine repeatable.
Most people do best with mild angles and short sets at first. The goal is comfort and consistency, not endurance. Shallow inversion can still feel effective, especially when paired with calm breathing and relaxed shoulders.
| Week | Typical angle | Session structure | Notes |
|---|---|---|---|
| 1 | 15–25° | 2 sets × 1–2 min | Focus on relaxing hips and jaw; stop if dizziness occurs. |
| 2 | 20–35° | 2–3 sets × 2 min | Add gentle ankle pumps or toe points if comfortable. |
| 3 | 25–45° | 3 sets × 2–3 min | Consider light stretching after sessions (not during deep inversion). |
| 4+ | As tolerated | 3–4 sets × 2–4 min | Maintain the lowest angle that provides relief. |
If a steady, repeatable home routine is the priority, a purpose-built option like the Heavy Duty Inversion Table is designed to emphasize stability, secure ankle holding, and controlled angle progression. It’s a practical fit for frequent use and for shared households where different users adjust height and ankle settings regularly.
For a simple post-session wind-down, pairing inversion with relaxed breathing, a short walk, and hydration helps the body “re-set” after decompression. If you enjoy adding a calming ritual to your recovery routine, the Essential Oils Relaxation Checklist is an easy way to structure a few minutes of downshifting after your session.
Most people start with 1–2 minutes per set at a mild angle and build up gradually. Short, repeatable sets are often better tolerated than one long hold, especially in the first couple of weeks.
A mild pressure sensation can happen, particularly at deeper angles. Reduce the angle and shorten the hold, and stop if you notice headache, dizziness, vision changes, or significant discomfort.
Many users report temporary relief from tightness by decompressing and relaxing muscles after long sitting periods. Pairing inversion with brief movement breaks and gentle mobility work typically improves how long the relief lasts.



Leave a comment