-
Shop
- Advanced Technologies
- AI Career Advantage Collection
- AI Skills for Creators & Freelancers
- AI Client Management
- AI Ethics
- AI Mindset
- AI Tools & Prompts
- AI Writing & Content Creation
- Audio, Voice & Music
- Design & Visual Creation
- Email, Messaging & Communication
- Freelancing & Business
- Marketing, Ads & Conversion
- Productivity, Workflow & Automation
- SEO & Search Optimization
- Social Media Content & Growth
- Strategy, Planning & Analytics
- Video Creation & Editing
- AI Skills Mastery 2026 Collection
- Bathroom
- Best-Sellers
- Car Accessories
- Confidence
- Dating & Social Skills
- Digital Resources
- AI & Technology
- AI Skills
- Beauty
- Car Buying & Ownership
- Cozy Feast Collection
- Financial Education
- Hobbies
- Home Styling & Organization
- Kitchen & Recipes
- Mindset
- Online Business
- Parenting & Child Development
- Personal Style & Fashion
- Pet Lifestyle & Wellness
- Smart Life with AI
- Travel Planning
- Wellness
- Yoga & Fitness
- Education & Learning
- Fall/Winter 2025–26 Fashion Collection
- Family & Parenting
- Fashion
- Furniture
- Gadgets
- Health & Beauty
- Health & Wellness
- Home & Garden
- Home Electronics
- Jewelry
- Kids & Babies
- Kitchen
- Kitchen Best-Sellers
- Lighting
- Online Business for Beginners
- Patio, Lawn & Garden
- Personal Growth
- Pet Care
- Pet Supplies
- Pets
- Smart Amazon Shopping
- Smart Home Living Guides
- Sport & Outdoors
- Stress Relief & Relaxation
- TikTok Growth & Monetization Mastery
- Travel
- Travel & Adventure
- Wealth
- Popular
- Best deals
Waterproof 3D Peel-and-Stick Backsplash Tiles That Last
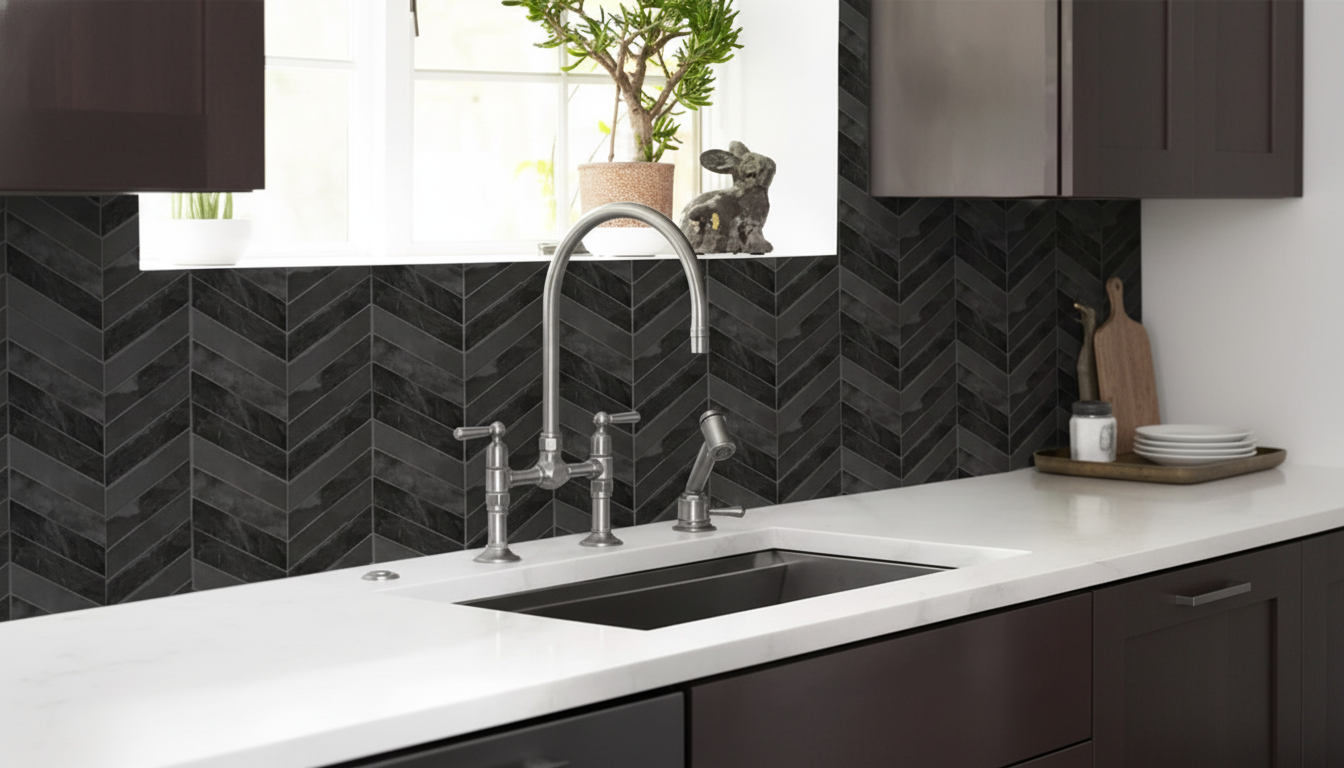
Durable 3D Peel-and-Stick Backsplash Tiles: A Waterproof Wall Upgrade for Kitchens and Bathrooms
A backsplash refresh can change the whole feel of a kitchen or bathroom without the mess of mortar or grout. Self-adhesive 3D wall tiles are designed to go up quickly, resist everyday splashes, and add depth and texture to flat walls—making them a practical option for renters, DIYers, and fast weekend updates.
What These 3D Peel-and-Stick Tiles Are
3D peel-and-stick backsplash tiles are self-adhesive wall panels with a raised surface that adds dimension and a more finished look than flat decals. They’re built for interior spaces where splashes and humidity are part of daily life—think sink areas, vanity walls, and laundry rooms.
Most styles install with basic household tools: measure, mark, cut-to-fit, peel the backing, and press the tile firmly into place. For the cleanest hold, they perform best on smooth, dry, sealed surfaces such as painted drywall, smooth existing tile, glass, metal, or sealed wood.
Where They Work Best (and Where to Avoid)
Great places to use them
- Kitchen backsplashes: behind sinks, along countertops, and as accent strips around cooking zones.
- Bathroom walls: vanity backsplashes, above wainscoting, and laundry areas with occasional splashes.
- Apartment-friendly updates: a tile-like finish without a permanent installation (removability depends on wall paint quality and prep).
Areas to skip or treat carefully
- Direct flame or extreme heat: keep away from open flames and high-heat surfaces; use a heat-safe barrier where required and follow appliance clearance guidance.
- Rough or porous surfaces: brick, unsealed concrete, and heavily textured walls can cause edge lift unless you smooth/skim-coat or seal first.
For cooking-area safety reminders, the NFPA’s cooking fire safety guidance is a helpful reference when planning materials around stovetops.
Durability and Waterproof Performance in Real Life
Water-resistant surfaces are made to handle routine splashes and steam, especially when seams and edges are kept clean. The most common cause of tiles lifting isn’t “too much water”—it’s usually residue. Cooking oils in kitchens and soap film in bathrooms create a slippery layer that prevents the adhesive from bonding fully.
The 3D texture can disguise minor wall flaws and add a more custom look, but seams still require patience. Straight layout lines and consistent pressure across every tile help prevent slight gaps that catch grime over time. In humid bathrooms, pressing/rolling thoroughly at install and allowing extra time for the adhesive to settle can noticeably improve long-term hold.
If you’re dealing with moisture issues or signs of mold in adjacent areas, follow reputable cleanup guidance such as the EPA’s mold cleanup recommendations to ensure the wall is truly ready before covering it.
Quick Installation Plan (Cleaner Finish, Fewer Bubbles)
- Prep the wall: degrease kitchen walls, remove soap film in bathrooms, rinse, and dry fully. Confirm paint is cured before applying tiles.
- Dry-lay the pattern: measure the full run, decide where cuts land (corners, ends, outlet areas), and keep focal lines centered.
- Peel gradually: start from one edge and smooth outward to avoid trapping air pockets.
- Use a roller or firm cloth: apply even pressure across the entire surface, spending extra time on edges and corners.
- Trim carefully around outlets and fixtures: turn off power before removing outlet covers; cut slowly for a tight fit.
- Finish edges: consider caulk at the counter joint and corners to reduce water intrusion and keep seams cleaner.
Installation Checklist by Surface
| Surface | Prep Needed | Notes |
|---|---|---|
| Painted drywall (smooth, cured) | Degrease/clean, dry fully | Wait for fresh paint to cure before applying for best adhesion. |
| Existing smooth tile | Clean grout lines, remove residue | Adhesion improves when grout is shallow; deep grout may telegraph through. |
| Glass/metal | Alcohol wipe, dry | Usually excellent adhesion; alignment must be precise. |
| Textured/porous wall | Smooth/skim-coat or seal first | Direct application may lift at high spots and edges. |
Cleaning and Care for a Like-New Look
For moisture-prone spaces, the CDC’s mold cleanup guidance can help you verify you’re not sealing over a problem area.
Common Fit Questions: Measurements, Cuts, and Coverage
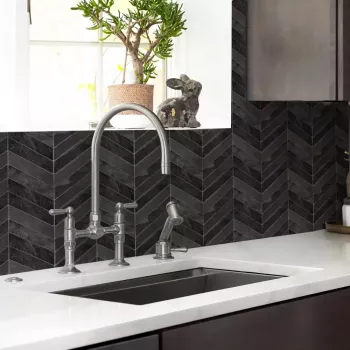
Product Spotlight: Durable Self-Adhesive 3D Peel-and-Stick Backsplash Wall Tile
If the goal is a fast backsplash refresh with a water-resistant surface and a more dimensional finish, consider the Durable Self-Adhesive 3D Peel and Stick Backsplash Wall Tile – Waterproof for Kitchen & Bathroom. The self-adhesive backing supports a no-grout approach, while the 3D texture adds depth that helps a plain wall look more built-in.
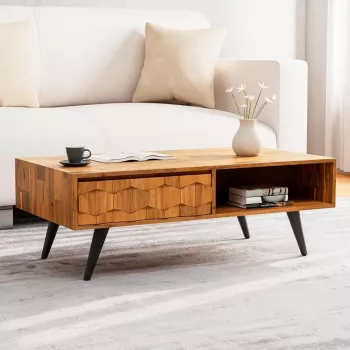
More Home Upgrades to Pair with a Quick Wall Refresh
After a backsplash update, a small furniture refresh can help the room feel more cohesive—especially in open-concept spaces where the kitchen flows into a dining nook or living area. The Stylish Wood Coffee Table is an easy way to echo warm tones and natural textures that often pair well with modern tile looks.
FAQ
Can peel-and-stick backsplash tiles be used in a shower?
They’re typically intended for backsplash and splash zones rather than inside-shower walls. Constant direct water exposure and heavy steam can compromise edges and adhesive, so check the manufacturer’s guidance and consider true wet-area materials for shower interiors.
Will these tiles damage paint when removed?
It depends on the wall condition, paint type, and how long the paint cured before installation. Properly cured, higher-sheen paints often hold up better than flat or weak paint; testing a small area and warming the adhesive during removal can help reduce peeling.
How close can peel-and-stick tiles go behind a stove?
Keep them away from direct heat and open flame, and follow clearance guidance for your specific cooking setup. If you want coverage behind burners, a heat-safe backsplash panel is usually the safer choice in that area.
Recommended for you
Large-Capacity Hot Towel Warmer for Bathroom Comfort
May 16, 2026


Leave a comment